Painting Andersen’s Mountaineering Cabin

Anderson's Mountaineering Cabin Image
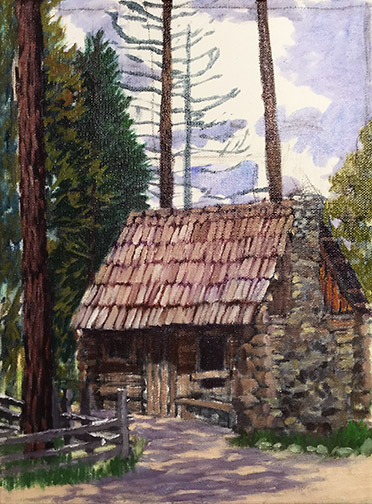
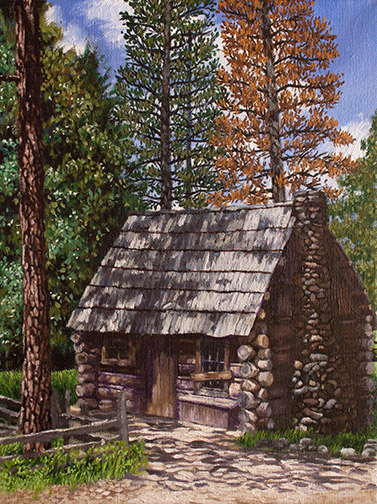
“Anderson’s Mountaineering Cabin,” 12” x 9” oil on canvas, Framed $913.00, Unframed $785.00

I recently finished this painting, begun en plein air, in Yosemite, during my stay as a Yosemite Renaissance artist in residence and I thought I’d walk you through its various stages from start to finish.

As many of you may have heard, during my residency, I invited many of my local artist friends to come up to the park and paint with me. This whole trip came together quickly, but even with short notice, 7 of them were able to make it. On this, our last day, 4 artists were painting with me.

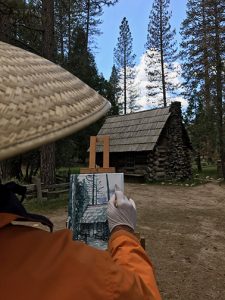
Anderson’s Cabin, is located in Pioneer Village, in Wawona, a collection of historic Yosemite structures from all over the park, brought together in one location to form a little trip back in time hamlet. There are many great structures to paint there, but we all decided on this one on that particular day.
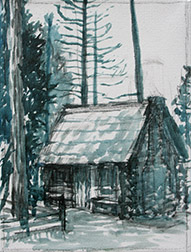
Anderson Cabin Turp Wash Image
My ink blue turp wash underpainting, quickly maps out the scene lighting.

I started this outdoor painting, as I most often do, with an ink blue turpentine wash (50% painting medium, 50% solvent) underpainting. I find shadows outdoors tend to be cool, so the blue is a good choice and since I always work from dark to light, using the one color prevents me from having to mix multiple dark colors, prior to getting all my darks blocked in. Mapping the scene lighting out quickly is critical in plein air painting, as the light changes very quickly. Not having to mix multiple dark colors significantly speeds the process.
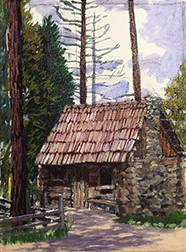
Anderson's Cabin Plein Air Image
My painting at the end of the plein air, on location painting session.

With the darks laid out, I quickly washed in general area color, prior to roughing in opaque paint. That way, if I miss tiny patches, known as holidays, with the opaque paint, they don’t show, the underlying canvas having been pre-tinted. With my darks down in ink blue, I begin adding medium value opaque colors, then lights and finally start replacing the ink blue dark wash with dark colors of the correct hue. Here’s the painting at the end of my 4 hour, on location, painting session.

I’m rarely happy with the final result of my plein air sessions and generally either work into the canvas back in my studio or use the painting as a color sketch for a larger studio painting. I’d committed to a show of the works we produced during the week, so, in the interest of time I’ve decided to add more detail to the actual plein air canvas this round.
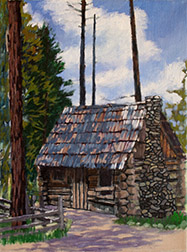
Anderson's Cabin 5/25 Image
After 1st day in the studio

Reviewing the reference photos I shot on location, I realize that in painting the roof I painted out all the shadows from the trees. During this first session in the studio, I begin returning the shadows to the roof, add dark grout to the chimney and lines separating the individual logs that make up the walls of the cabin. I also finalize the sky and clouds, since everything else will be painted over this.
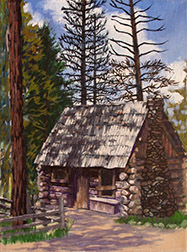
Anderson's Cabin 5/30
End of 2nd studio session

During my next session I finish most of the detailing to the roof (I found I needed to add light values, as well, in order to get the shadows correct), I begin to detail the log walls of the cabin and start adding back branches (painted out by the sky) and foliage to the trees behind the cabin.
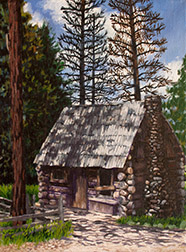
Anderson's Cabin 6/1 Image
End of 3rd studio session

Another day and it’s about working the values on the chimney side of the cabin. I needed to adjust until that side of the building  looked like it was truly in shadow. Detailing the stone chimney, including adding the light that hits its stones here and there was a bit tricky, but I finally got it to a point where I was satisfied. I realized the ground shadows, there in the morning, but painted from memory, at the end of the day, were wrong, so I changed those.
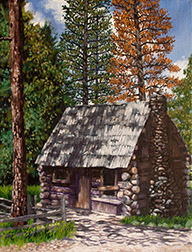
Anderson's Cabin 6/6
A couple of sessions later

Through a couple more sessions I detail the foliage and trunks of the trees.

One last session of final details, including the detailing of the rock border around the grass in front of the chimney, takes me to the finish, shown at the top of this post.

I popped the painting into a floater frame and took it wet, along with the other finish (El Cap & Dogwood) and plein paintings I created during the week, over to Gallery 5, so I could help Jon Bock install the show. The show is titled, “A Week in the Park: Plein Air Works by Trowzers Akimbo & Friends.” It’ll be there through June 22, 2017.

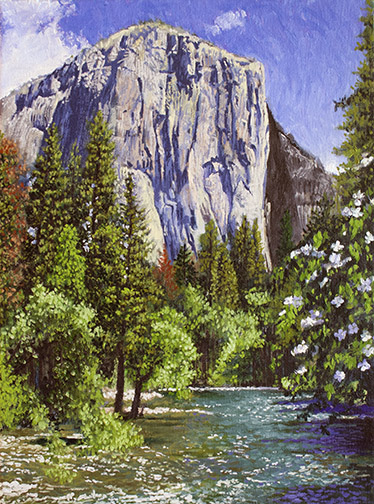
Painting El Capitan & Dogwood

El Cap & Dogwood Image
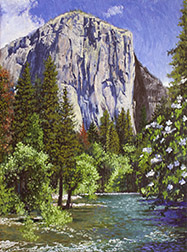
“El Cap with Dogwood,” 12” x 9” oil on canvas, framed $913.00, unframed $785.00

This is the monumental rock face in Yosemite that Alex Honnold just solo free climbed (Saturday June 3, 2017) in under 4 hours, breaking all previous records. Kudos to Alex. He may be able to climb it, but can he paint it?

I recently finished this painting in my studio, beginning it, on location, during my Yosemite Renaissance artist in residence stay in the park from May 8 – 14, 2017. To be more precise I began this piece, plein air, on the Saturday of my stay, May 13.

I’ve covered the details surrounding the discovery and difficulties encountered in actually getting setup to paint this site in earlier blog posts: Artist in Residence – Day 4, Day 5 and Day 6, if you’re interested. This post is going to be about the actual painting of that monument.

Through trial and error, I’ve come to the conclusion that the best way, for me, to paint plein air is by using the Indirect Painting method. I’ve tried the Direct Painting approach, most recently in the first few days of this residency, but I’ve always been unhappy with the results. In a nutshell, with Indirect Painting an underpainting, usually monochrome, is done before the full color over-painting is begun. By contrast, Direct Painting starts laying down full color from the get-go.

Here’s why I believe Indirect Painting is best. All painting should start with the darks in the scene and progress through the medium values, ending with the lights. And always, the painting should be worked as a whole. The darks are the armature that hold the entire painting together. Get your darks right and your halfway home with the entire painting. You want to work the painting as a whole, because each color or value you add, changes what’s already there, through juxtaposition. If you slave away on this corner or that, rendering to finish, while leaving the rest of the canvas untouched, you’re setting yourself up for a fall. When you add the rest of the color you’ll learn it changes what you so diligently rendered up front. The colors in that early rendering no longer look correct.

Anderson Cabin Turp Wash Image
Don’t have a shot of my El Cap monochrome turp wash, but here’s one from the following day.

The light changes quickly, when you’re painting outside, so it’s important to establish the lighting quickly. You can always choose to adapt to the light later in the day, if you like that better than what you started with, but if you don’t get that first lighting scheme down quickly, you’ll have no record of it. With direct painting you’re losing valuable time, mixing this color dark for the tree trunks, that color dark for the foliage, another dark color for the water, etc., all in an attempt to get all your darks down quickly. By using the Indirect Painting method, I mix one color and using turpentine washes (50% painting medium, 50% solvent) lay down all my darks quickly. I’ve speedily established the morning’s lighting scheme and I’m ready to start painting in color.

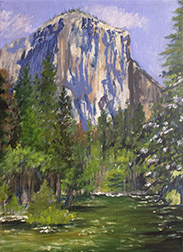
Plein Air El Cap & Dogwood Image
My plein air painting at day’s end. Note that many of the darks are my underpainting.

So after completing my darks underpainting, I spent the rest of the day laying down opaque color with confidence, knowing I had a darks map of the morning’s lighting conditions. In fact, I could concentrate on the colors of medium and light value first, knowing my underpainting darks were there and that I could change them to their proper colors later, if necessary. You may have noticed that my underpainting is ink blue. I find most outdoor shadows are cool, so the color is a good choice for plein air painting. When I do an underpainting of an indoor subject, like a still life or portrait, I’m more likely to use the warmer, burnt umber.

El Cap & Dogwood 05/17 Image
About 8 more hrs. working on the original plein air painting, in the studio.

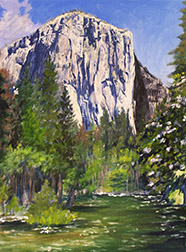
Back in the studio, working from reference photos I’d taken that day out in the field, I tore into my original plein air painting, adding more detail, at a more relaxed pace. Since so much of the painting was resolved that day, on location, I felt comfortable concentrating my effort directly on the rock, rather than working up the detail in the entire painting gradually. El Cap was the hero here, I needed the confidence that it was working, before I could relax and work up the supporting cast. I also reworked the sky at this time. I liked the color and clouds in one of my later photos better than what I’d painted on location.

El Cap & Dogwood 05/22 Image
Adding detail to the foliage and river.

Comfortable that El Capitan was pretty much resolved, I started detailing the rest of the painting, working on it as a whole now: trees, bushes, river, dogwood, etc. You’ve probably noticed I like color. I carefully inspect every subject for less than obvious color I can enhance, the blues in the shadows on the right, cast on the river by the trees, for example. I also put back the aqua in the Merced River that I remembered being there in the morning, but missing when I finally got to the river at the end of the day. Unfortunately, your darks underpainting doesn’t help you remember what color things were when you started. There’s a special  advantage gained by, at least, starting your paintings on location, that’s lost when you paint from photos exclusively: color memory acquired through actually being there.

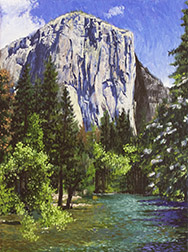
El Cap & Dogwood 05/23 Image
Getting the whitewater in and more detailing to the foliage.

Getting close to the finish here. Added more light values to the foliage. Notice how just adding the white water brings the river to life, bubbling and churning. Where I had a pond before, we’re now looking at the Merced River. I find it’s worth taking the time to place these small shape accurately, even if painted loosely, they can make the difference in whether your subject appears static or alive. I also added more detail to the dogwood here.

With just another session or two, I arrived at the finish (shown at the top of this post) : my final level of light values and a little necessary nit-picking here and there. Just in time for Alex to scale it!

Artist in Residence in Yosemite – Day 7

Anderson's Cabin Image
My days work, © 2017 Trowzers Akimbo

We traveled out to paint, a large group, this final day, Sunday, May 13th, of my week-long Yosemite Renaissance artist in residence stay in Yosemite. The painters, in addition to myself, included Terry Robinson, Lura & Kerby Smith and Vicki Thomas.

We decided to avoid the tourist insanity that was going in the Valley on Saturday and select a painting location closer to the cabin. Our first choice was Alder Creek, but the two ladies in our group were leery of navigating the steep drop, while carrying there painting equipment from our parking location, along the roadway, to the bank of the creek. Lura had recently injured her leg and wasn’t sure how well it would hold up traveling down the steep trail. While beautiful, the vistas offered by Alder Creek were too similar to the churning water paintings I’d created of Chilnualna Falls the first 3 days of my stay, for me to bother nudging the ladies down the hill. We decided to choose a location from the offerings of Wawona’s Pioneer Village.

After individually scouting the many offerings presented by the Pioneer Village, we all independently  set up in front of the Anderson Mountaineer’s Cabin. There’s plenty to choose from, as far as painting goes, here, I highly recommend it as a painting destination, if you’re in Yosemite. The local artist group I belong to, Yosemite Western Artists, travel up here as a plein air group often to paint. In fact, they’re heading up there again today.

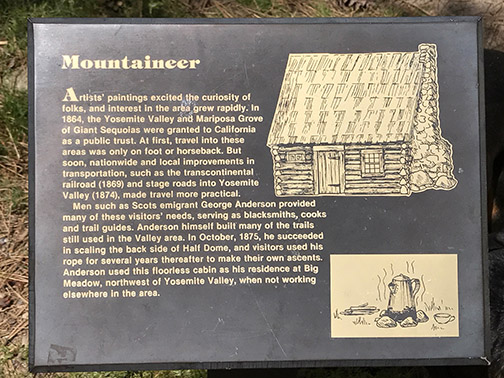
Anderson's Cabin Plaque Photo
© 2017 Kerby Smith
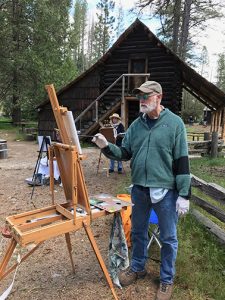
Trowzers, Terry & Vicki Painting Photo
© 2017 Kerby Smith

At one point during the day we were joined by a visiting artist, who plopped down on an available log bench and began an ink drawing of the cabin in his small sketchbook. We introduced ourselves and he shared the drawing on which he’d been working. Turns out he and his son have got a challenge going to each do at least one drawing a day. I love the people you meet when you’re out painting plein air and in a location like Yosemite, those you meet are from around the world. Someone looking over my shoulder, as I work, told me I was new Bob Ross. Whether that’s a complement or a cut depends on how you feel about Mr. Ross. Must have been my “happy little trees.” Given the enthusiasm of the delivery, I’m sure it was meant as a compliment. That’s how I’m going to accept it, anyway!

We put in another long day, wrapping around 5pm, when the sun began shining through the backside of our canvases.

Trowzers Painting Indirectly Photo
Indirect painting, © 2017 Kerby Smith

Those of you who’ve been following these posts may recall that I set out on this week-long outing, switching from my normal indirect painting approach to direct painting to see if that technique would be faster and allow me to complete a plein air painting in a single day. Well, unhappy with the direct painting results, I switched back to my indirect painting technique on Day 5, the Half Dome painting from Glacier Point. I paint from dark to light, realizing that the darks are the armature that paintings are built upon. Direct painting required me to constantly clean my brushes and mix up darks of various hues. When I paint plein air indirectly, my underpainting is a monochrome turp wash (50% painting medium, 50% solvent) of ink blue, requiring no brush cleaning or additional color mixing. I get all my darks down more quickly (critical, given the rapidly changing light with plein air painting) and can move on to the opaque laying in of medium and light polychrome values. I’m much happier with the end results of this approach.

The bottom line is, I just don’t like my plein air painting final results. They look like color sketches to me. I can’t help but feel they require more time to deserve hanging in a frame. While I love the process of painting plein air (you absorb information about the scene unavailable painting from photos alone). In future, I think if the result warrants it, I’m just going to use the plein air painting as a color sketch for a larger, more finished painting.

As the day ended, I put my visitors in their vehicles, wished them a safe trip home and after a quick clean-up of the cabin, started down the mountain to my home in Oakhurst…a melancholy ending to a wonderful, fruitful week with friends!

P.S: I’ve just been informed there’s going to be a show of the work produced during the week, at Gallery 5, in Oakhurst, CA in a couple of weeks. Stay tuned to my blog for the details, which I’ll post once they’re available.

Artist in Residence – Day 5

Half Dome Painting Image
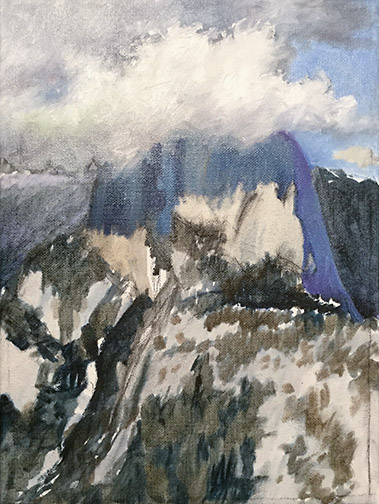
My in progress 12” x 9” oil painting of Half Dome from Glacier Point.

With a promise of rain, we rose Friday morning, May 12th, and still headed over to Yosemite Valley to see if we could capture the stunning POV of El Capitan we witnessed yesterday. We were hoping we could get something accomplished, before the storm hit and, when it did, that the rain would be light.

Halfway there, our hopes faded, as we climbed into misty clouds that required the occasionally swish of windshield wipers to refresh our view. On arrival, it wasn’t raining, but all the rock monuments in the Valley were hidden behind clouds. We stopped a Pohono Bridge, hoping to set up and paint there.  Didn’t need clear skies for that, since it’s on the Valley floor, but with the snow melt swollen Merced River, there was no bank to set up painting gear, on either side of the river. Anyone wanting to paint this bridge will need to wait until later in the year.

We decided to pick up the Valley Loop trail there and walk the 1.5 miles to our El Cap beauty shot. We wanted to hang out in the Valley awhile and see if the clouds cleared from the monuments. A walk along the trail was a pretty beautiful time-killer. Much of the loop was underwater and we had to make our way forward, roadside, until we’d passed the flooded sections. A word of caution to anyone planning to trail in Yosemite Valley in the near future: if you’ve got summer mesh hiking footwear, be sure to bring along an extra pair of socks, you’re likely to get your feet wet.

El Cap was still deep in cloud cover, when we reached our destination and it started to rain. So, we pulled our hoods up over our heads and backtracked along the trail, the mile and a half to the cars. I decided I was heading back to Wawona to do some painting, in the cabin from reference shots taken earlier in the week, if I had to. Let the rain come down outside, I wasn’t going to miss out on a day of painting. Kerby decided he’d stay in the Valley for a while: he had a few photographic ideas he wanted to play out.

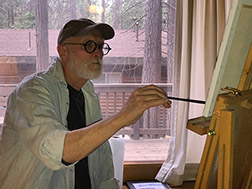
Me Painting in Cabin Photo
Photograph © 2017 Kerby Smith

Back at the cabin I looked around outside for something to paint. Itwasdefinitely going to rain, but I was willing to get started out in the open, take some reference shots and finish inside. I seriously considered the exterior of the cabin we were in staying in. It was interesting enough to paint, but who, other than those of us staying there, would find it interesting enough to want to buy it. I could imagine the gallery curator’s pitch, “It’s the cabin Trowzers Akimbo and the rest of his artist friends were staying in, while they were up in Yosemite painting for a week.” “Trowzers who?”

I decided a better idea would be to paint from one of the photos I’d taken earlier in the week. In fact, I had some good ones on my new Verizon phone, that I’d taken at the destined El Cap location. I just needed to get the photos from the new phone to my laptop and from there to my iPad. I linked Bluetooth between the two devices and attempted to send the photos over…nothing. After a few more tries, I gave up. This wasn’t going to work. Android didn’t seem to be interested in conversing in OS X with my MacBook Pro. With no Internet connection, I couldn’t get online to run down a solution to my problem. I seriously thought about chucking the idea of painting, at this point, and taking a well deserved nap the rest of the afternoon. A lessor man would have, but I’ve learned to embrace my neurosis and harness the fears of failure lurking there to keep me plodding forward towards success!

Small Half Dome Photo
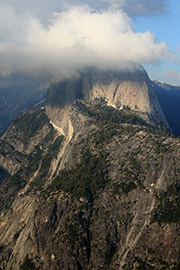
Thursday’s photo of Half Dome from Glacier Point.

My digital SLR camera memory card was full and I’d emptied it onto my laptop, the night before, so I could clean the card and make room for new photos. I poured over the photos in the folder for something worthy of a painting. The only candidate far enough removed from the Chilnualna Falls paintings I’d been creating all week, was one of the shots I took yesterday of Half Dome, from Glacier Point. I loved the photo, but I wasn’t sure that once it was translated into a painting, it would still be legible as Half Dome to on-lookers: so much of the rock was obscured by the clouds and the Glacier Point perspective offers a less than typical point of view of the monument.

It having reached 3:30 or 4 pm, it was going to be this image or nothing. I set up my french paintbox near a window that would offer me the latest possible natural light and began slapping paint down on the canvas.

Only the finished painting will tell me whether Half Dome reads of not, but as you can see by the in progress painting above, at least I didn’t allow myself to succumb to a nap. Remember what Salvador Dalí said, “No masterpiece was ever created by a lazy artist!” Okay, Salvador, I skipped my nap, now where’s the masterpiece!

Artist in Residence – Day 3

In Progress Chilnualna River Painting
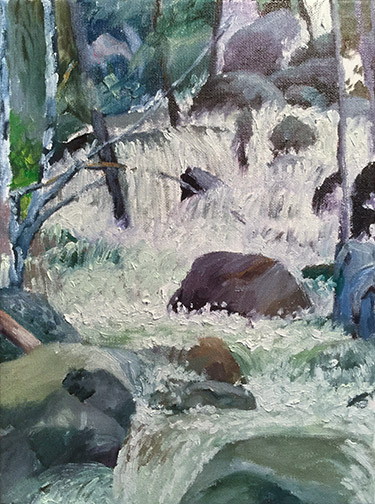
Today’s in progress plein air painting of the Chilnualna River.

No, you didn’t miss a blog post, I’m posting day 3, before day 2, because I’m back in my studio tonight and I forget to bring the day 2 painting back with me from the cabin.

I don’t have an Internet connection (I’m told they shut their Internet connection at the cabin down in the winter. May is winter?) or even cell phone service anywhere in the Wawona area of Yosemite National Park, where the Yosemite Renaissance artist in residence cabin has been provided for me. Thank you AT&T! What are you thinking? No one with one of your cell phones visits Yosemite? I’m going back up to the cabin tomorrow afternoon, after I finish teaching art to  my two 5th grade classes at Woodland Elementary School tomorrow, so you won’t see another blog post, until I’m back in the studio, late Sunday.

Here’s today’s in progress plein air painting. It was my second day painting with artist friend, Sandy Kowallis. This time we hiked down the trail that runs from the top of the falls, along the river, to where it joins the south fork of the Merced River. We picked a section we liked and set up there. The water is so ice cold that any slight breeze sends air-conditioned air in our direction. It made for a very comfortable day, at a temp much lower than what we found, as soon as we left the river’s edge.

Tomorrow I’m painting with friend, photographer and artist, Kerby Smith. Something other than the Chilnualna, I suspect.

Artist in Residence in Yosemite – Day 1

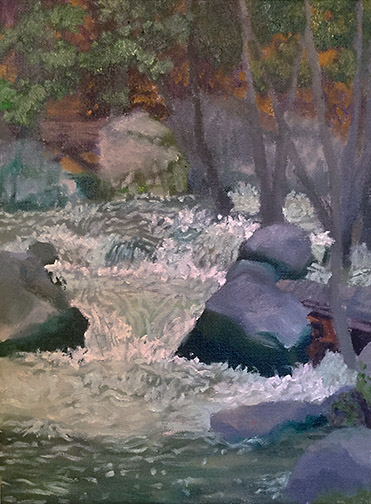
In progress Chilnualna Falls, oil on canvas 12″ x 9.”

I’ve been awarded artist in residence by Yosemite Renaissance, which comes with a 2 bedroom cabin at Wawona, in Yosemite National Park, for a week.

I’ve invited many artist friends, in the area, to come up and join me, so we can go out together and paint plein air. Some are staying with me overnight in the cabin for a day or two, others coming up for the day. 7 days of painting with friends in Yosemite.

I’ve decided to use the week to see if I can make selections and simplify enough to finish the paintings on location, in one sitting. True plein air. It’s tough for me, because I generally like to add a little more finish to my paintings. I haven’t been able to resist taking all the plein air paintings, I’ve produced so far, back to the studio for more polish, but it’s hard to justify all the extra work put into paintings so small. Better to find a personal shorthand I can apply to my plein air paintings.

Today was the first day of the residency and I was joined by Carolyn and Sandee, two artist with a lot of experience painting plein air. We chose to paint a location close to the cabin, Chilnualna Falls. With all the rain and snow we had this winter, combined with the current warmer temperatures, our waterways are breaking records. This normally trickling stream’s been converted into a torrent of quickly moving, twisting, splashing gallons of water.

All good, but I didn’t reach my goal today. This painting still needs more work, before it’s finished, even by plein air standards. I think, with the waterfall, I took on too much for the time allotted. Wish me better luck tomorrow.

New Ground

Yosemite Falls from Sentinel Swinging Bridge Image
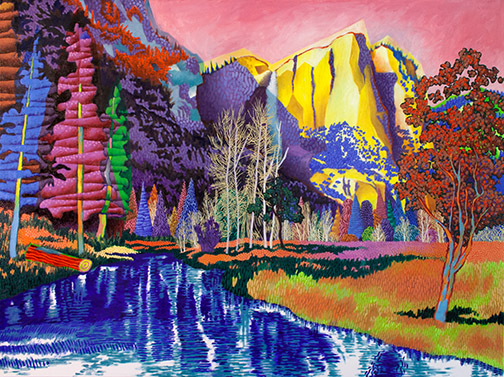
“Yosemite Falls from Sentinel Swinging Bridge,” 30″ x 40,” oil on canvas, framed, $4,250.

I just finished an abstraction of the view of Yosemite Falls from the Sentinel Swinging Bridge. I work with abstractions as often as I do with representational pieces (actually more), but this one was more challenging.

My abstract forms are usually developed through multiple viewpoint perspective (MVP). For those unfamiliar with MVP, it’s an approach where the artist considers their subject matter from, not just a single point of view, but, instead, from all sides, creating images that represent multiple perspectives of the subject at the same time in a single image. The approach was pioneered by Picasso and Braque through their explorations with cubism.

Anyway, MVP depends on the viewer’s knowing what the subject matter looks like in its original state, before it’s abstracted, in order to be able to appreciate how it’s been abstracted. In a scene like this one, completely comprised of natural organic elements, representing elements from all sides can go unrecognized, so I had to depend on other systems of abstraction. I leaned heavily on geometric, organic and reductive abstraction here to arrive at my final solution. These methods of abstraction are generally called upon, to some degree, in all my abstractions, but this subject required me to rely on them exclusively.

Being forced to work without MVP took me out of my comfort zone, making me more insecure, a good thing for an artist. An indication that you’re exploring new personal territory and not relying solely on solutions that have been successful for you in the past. I highly recommend it.