When I was a kid and I finished a piece of artwork I felt warranted a mat and frame, I cut the mat, grabbed my roll of masking tape and tapped the piece into the mat. When a dark stain began to appear, years later, where tape touched art, I suspected I was doing something wrong.
Since those early days, I’ve learned about pH acid levels in papers, mat and mounting boards and the proper way to mount an artwork. Hinging is used to properly attach original art to acid free mounting boards in a manner that does no harm to the artwork and provides a weak link, should the work ever be mishandled. The concept is that the hinge, not the artwork will tear from the mounting, if the artwork is abused.
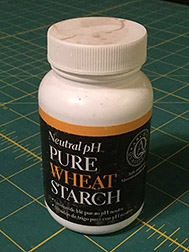
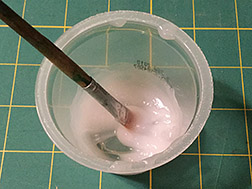
The hinges should be made of Japanese paper (rice paper or mulberry paper). If you take your original art to a framer to be hinged, matted and framed and they want to use something other than Japanese paper for the hinges, find another framer. It’s that important! The hinges need to be attached to the artwork and mounting board using neutral pH Wheat Starch paste. Both the paper and wheat starch can be purchased at your art supply store. The wheat starch is turned into a paste, by adding distilled water and heating it in a double boiler or microwave oven (my preferred method). Instructions on accomplishing this are on the package. Wait until all your other materials are prepared and ready, before making the wheat starch paste or it can harden before you’re ready to apply it.
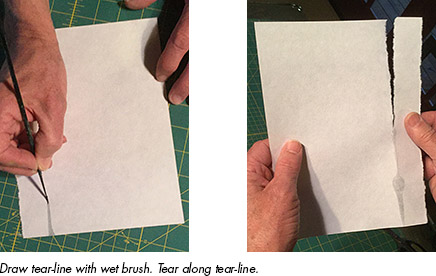
You want to tear, not cut out, your hinges from the sheets of Japanese paper. Sharp, straight, uniform edges are more likely to telegraph through the artwork you’re hinging, than the organic, feathered torn edges will. The tearing and feathering is easily achieved. Wet a small, thin paint brush with water. Draw you tear line on the Japanese paper with the wet brush and pull the paper apart along the wet tear line.
You’re going to create a “T” or cross, made up of two, overlapping strips of the Japanese paper for each hinge. A minimum of two hinges, across the top of your artwork, are necessary, but I like to add a third along one side of my art, for more stability, in case someone carries it sideways.
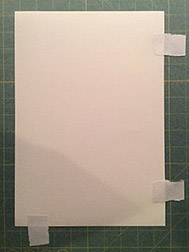
Apply 1/4″ of the wheat starch paste to one end of half of your paper strips. Allow the paste to dry a bit, so it’s not sloppy wet and glue these hinges to the back of your artwork, leaving the long dry portion of the hinge protruding. Set the artwork, with attached paper strips, aside to dry. Because the paste is moist when you attach the strips to your artwork, I don’t like to use hinges on artwork created on thin paper, like normal weight pastel paper or drawing paper. I don’t want to take a chance on the artwork buckling where the hinge attaches, due to the moisture and, with thin paper, I’m also concerned about the paper hinge strip telegraphing through. In these cases, I avoid paper hinges and use archival corners instead (see my post Special Framing for Soft Pastels for an image of an archival corner).
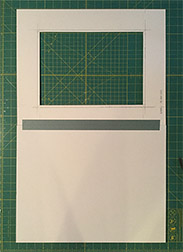
Proper archival mounting of your artwork requires you to hinge the art to an acid free mounting board, not the mat. You want to set up mounting board and mat as a hinged sandwich for your artwork. Butt top edges of mounting board and mat and attach them together with a hinge made with a piece of archival, acid free tape.
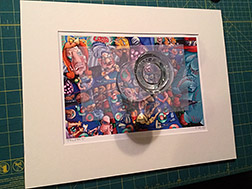
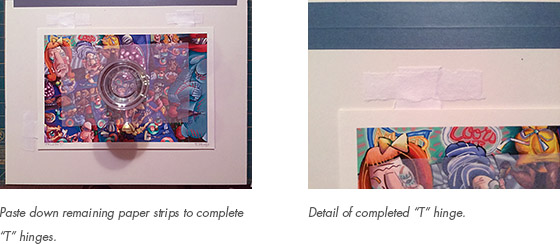
Slip your artwork, with the paper hinge strips attached, into the mat-mounting board sandwich and properly align the image in the mat window. You’ll need to place a weight on the artwork, to hold it in place, while you flip up the mat out of the way and paste down the final strips of paper, to complete your hinges. I’ve found a heavy old-fashioned glass to be a great weight. Be sure to place a piece of paper (I’ve used tracing paper here) beneath your weight to prevent it from marring your artwork.
Using your wheat starch paste once again, paste down the final paper strips to make the “T’s” and complete your hinges. Allow this paste to dry and you’re ready to close the mat-mounting board sandwich and install the assembly in your frame.
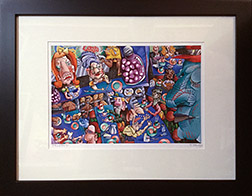
Rest easy in knowing you’ve done all you could to provide a professional, museum quality, safe, acid free, archival home for you valuable piece of art!
Great post! I’ve been using archival hinging tape all these years (the same roll!).
I like to weight my artwork down with a brimming, cup of hot cocoa
Thanks, Rich! My preference is vodka on the rocks, with a few olives, but I haven’t overcome the problem with it leaving a ring on my watercolors.
Thanks for this post. I’m wondering what is the name for the type of table (or maybe it’s a mat that you lay on top of a table?) shown in the photo that has the grid? That would be a super helpful tool.
It’s a mat and I believe it’s referred to as a “self-healing cutting mat.” I’ve also heard them referred to as a “rotary cutter mat.”