Brothers & Sisters in Art

CalArts - Chouinard Logo

Last weekend I made the trip down from the Sierra Nevada Mountains, where I currently live, to Los Angeles, where I was born and raised, for the CalArts/Chouinard Art Institute alumni reunion. I don’t often make it to these get-togethers, but they were giving special awards to my good friend, artist, Dennis Lewis, and posthumously to my illustration lab professor, Harold Kramer, so it was a must attend.

Only 4 of my actual classmates were there, the group ranged from geriatrics to students currently attending CalArts. I was sitting next to an architect, a graduate from a class many years before my own. I unexpectedly ran into, Tony, the son of artist (a Chouinard graduate) whom I’d worked with for 12 years, when I was directing animation for Kurtz & Friends. Tony and my own son used to hang out together at all the Kurtz & Friends events that included family, which were most of them.

The reunion presentations were fine, my friend, Dennis’, acceptance speech being the highlight of the program. Dennis is a great natural storyteller and can’t help but crack the room up with his cast of a thousand in character portrayals of student interactions, from his many years of teaching and his rendition of how he met his beautiful wife. But there was a rich reward, above the joy of watching my close friend of 50 years receive the recognition he deserved and that was introductions to and conversations with the alumni, most of whom I’d never met before.

Art knowledge is timeless, so when you converse with an artist that’s 90 years old or one that’s 19 years old, you share common interests and speak a common language. Age or generational differences melt away as you discuss Richard Diebenkorn and the influence Matisse had on his work (a current exhibit at SFMOMA) or the Calder retrospective at LACMA last year or the student from this class or that who’s recently gained international recognition. In the company of artists you share like interests far beyond those bound to generation and become part of a living, breathing organism with a focused passion for art.

Pick up a paintbrush, chisel or other creative tool and you’re rubbing shoulders with Leonardo, Van Gogh, Cezanne, Picasso, Hockney and all artists past and present. Welcome to the fraternity of artists, take full advantage of your membership!

Fear of Varnish – Part 2

Varnishing Photo

Varnishing Acrylic Paintings

In the previous Fear of Varnish blog, I explained the proper procedure for preparing and varnishing an oil painting (the way I do it anyway). In this blog I’ll cover the proper way to varnish an acrylic painting. The recommended procedure has changed several times since 1953, when the acrylics we use today first became available to artists, so even if you think you know the right way to varnish an acrylic painting, you might want to follow along. I utilize the latest discoveries and recommended procedures in my process.

Acrylics, including acrylic varnishes, harden, but never truly dry, as oil paints do, instead, they remain slightly tacky. You may have noticed this yourself, if you ever laid two of your acrylic paintings face to face and then separated them. Recently it was discovered that on a microscopic level, acrylic paints actually attract dust to them and then attach that dust to the surface of the painting, through this tackiness, dulling the painting over time. So, the old method of finishing your acrylic painting off with a coat of acrylic varnish, will attract dust to the surface and dull your painting over time.

For this reason, experts began to recommend applying regular removable oil painting varnish to acrylic paintings as the final protective layer. They later discovered that removing that varnish to clean an acrylic painting, if it became dirty, was removing micro particles from the surface of the acrylic painting, along with the removable varnish.

Given the above, experts now recommend a couple layers of permanent acrylic varnish, followed by a couple layers of regular oil painting removable varnish. This way, when removal of the oil painting varnish takes a micro-layer of acrylic surface with it, it will be taking it from the sacrificial transparent layers of acrylic varnish, not from the surface of the painting itself.


Applying the Barrier or Sacrificial Layers

Allow your finished acrylic painting to dry for at least 72 hours. Make sure the surface of your painting is free of dust or dirt and apply the first coat of non-removable acrylic varnish, either brushing it across the painting horizontally or vertically. You only want to apply a thin layer and don’t over brush or overwork it. Overworking this varnish can cause it to cloud. Acrylic varnish comes in gloss, matte and satin finishes. You can also get it in a spray can, if you prefer that to brushing it on. Let the first coat dry 24 hours and apply a second coat of the permanent acrylic varnish. Apply this coat by brushing it in a direction perpendicular to the direction you brushed in applying your first coat. Allow this final layer of permanent acrylic varnish to dry 72 hours, before proceeding to the application of the removable painting varnish.


Applying the Removable Painting Varnish

Once your Barrier/Sacrificial layer has dried for 72 hours you can apply your removable varnish layers. Like with the acrylic varnish, apply the first layer either brushing on the varnish in a horizontal or vertical direction. Apply your removable varnish layers thinly and don’t over brush or overwork them. Doing so can leave brush strokes in your varnish layers. Removable painting varnish is also available in gloss, satin and matte finishes. You can get it in a spray-can version, if you prefer that to brushing. Allow this layer to dry for 24 hours, then apply a second layer of the removable painting varnish, brushing it on in a direction perpendicular to the direction you used with the first layer. For more detailed instructions on application of the removable varnish see the blog Fear of Varnish.

Happy varnishing!

Fear of Varnish

Varnishing Photo

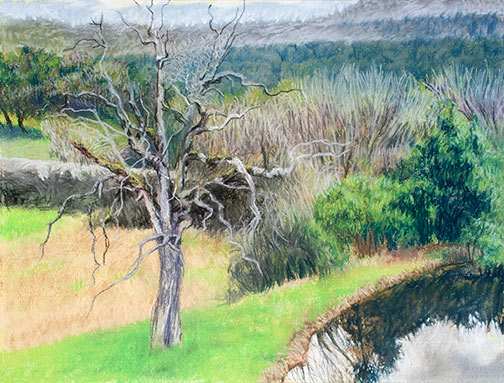
With our local open studio tour, Sierra Art Trails, on the horizon, it’s time to think about getting some varnish on all those dry, but unvarnished, paintings in my studio. I’m reminded of all the recent conversations with other artists about the varnishing process and of all the confusion and misinformation out there. So I thought I’d share the latest and greatest information on the subject, uncovered by my own ongoing research, the methods I currently use in varnishing.

The process of varnishing and preparing for varnishing is a little different, depending on whether you’re varnishing an oil painting or an acrylic painting. I’ll cover varnishing an oil painting in this blog and varnishing an acrylic painting in a future blog.

Varnishing an Oil Painting

Normally, an oil painting needs to dry for 6 months to year before you can apply the protective painting varnish. The length of drying time necessary is dependent on the thickness of the paint that’s been applied. The best test I’ve discovered for telling if an oil painting is dry enough to apply varnish is to put a little turpentine on a rag and lightly rub one of the thick applications of pigment on your painting (If you’ve used Titanium White in your painting, it’s a good color to test, as it’s one of the slowest drying paints). If any of the pigment appears on the rag, it’s not dry enough yet for varnish.

If you use Gamblin’s varnish, Gamvar, you can varnish sooner. Here’s the test they recommend for determining when you can varnish: lightly press your fingernail into one of the thick applications of paint. If it makes an impression in the paint, the painting is not ready, if it does not, you’re ready to varnish.

Oiling Out

Before you varnish, however, an oil painting should be “oiled out.” I’m surprised by how may artists I know have never heard about this. What is “oiling out” you ask? Oil paint can “sink in” to your painting surface, as it dries, giving an uneven sheen to the surface of the painting, with some areas more matte than others. This is because some of the oil binder in the oil paint has been absorbed into the painting ground. Many factors contribute to this phenomenon, an in-properly prepared ground, how much or little medium or linseed oil was used in the painting process, etc. If you apply your protective varnish to a painting in this condition, the varnish can be absorbed into the matte areas of the painting, just as the oil from the oil paint was, telegraphing the same uneven sheen across the surface of the varnish that the painting had before you applied the varnish.

So, before you varnish, you want to “oil out” your painting. Actually, since oiling out, unlike varnishing, can be done as soon as your painting is dry to the touch, it’s a great aesthetic interim step anyway, evening out the sheen across the surface and providing a better presentation for exhibition, before the painting is dry enough to varnish.

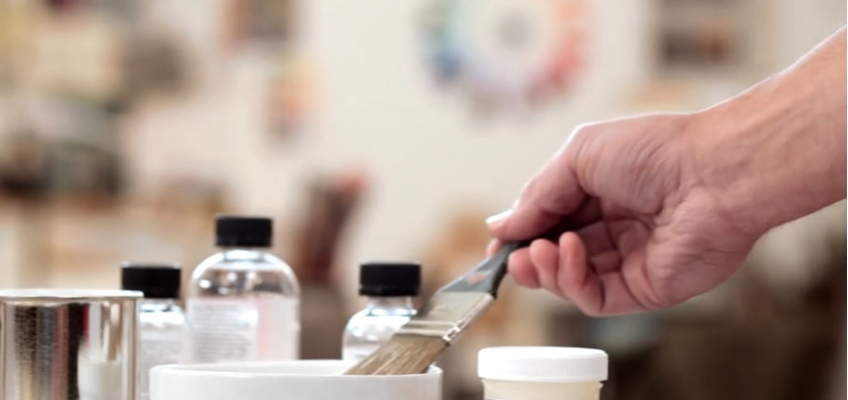
Oiling out is accomplished by applying artists painting medium to the surface of the painting, either by gently rubbing the medium into the surface with a lint-free rag or brushing it on the surface and then after 2 minutes, removing any excess medium with a lint free rag. If after oiling out and allowing the painting medium to fully dry, your painting still has matte “sunken in” areas, you can do a second oiling out. Here is how Windsor & Newton demonstrates the process: https://youtu.be/4oSU6PLEPpw. Here is how Gamblin demonstrates the process: https://vimeo.com/51473622.

Varnishing the Oil Painting

Once your oil painting has dried for the prescribed period of time (6 months – 1 year) and you’ve “oiled out” the surface of your painting (the oiling out medium must be dry to the touch), you’re ready to apply the varnish. You want to make sure you’re applying a removable painting varnish. In addition to enhancing the color and richness of your unvarnished painting, varnish protects your painting from elements in the environment that it’s exposed to over time. If, many years from now, your varnished painting has become dirty, it will be the protective varnish that has taken the abuse, not the painting itself. A removable varnish can be dissolved away with mineral spirits and a new clean layer of varnish applied.

You also want to be sure the varnish you choose is described as clear and non-yellowing. You don’t want to apply varnish on a rainy day. Doing so can sometimes cloud varnish. Application is recommended with the painting lying on a flat, horizontal surface. Since varnish is not very viscous, it has a tendency to run, while wet, so your painting should remain horizontal until the varnish has dried. Traditional varnish has a powerful odor and the vapors aren’t great for you. Unfortunately, all recommend you apply varnish in a room without a lot of air movement to prevent dust traveling around and landing on the varnish as it dries, which mean applying it with doors and windows closed. So, you’ll want to choose a location where you can apply the varnish then leave the room, close the door and not return until the varnish is dry. I’ve made the move to Gamvar, as it’s virtually odorless. Most recommend, “tenting” your painting while the varnish dries, to prevent dust landing on the surface. I do this by using four bottles, jars or cans of equal height, as posts, placing one at each corner of the painting. I then take a piece of cardboard or mat board, slightly larger than the painting and balance it on the four these four posts.

Varnish comes in gloss, satin and matte versions and you can mix the various versions to arrive at a custom sheen. Varnishes can be applied with a brush or sprayed onto the painting (Gamblin’s varnish, Gamvar, is brush on, only). Follow this link to see Windsor & Newton describe their various varnishing products and demonstrate applying varnish with a brush: https://youtu.be/ZNucC0XCRhc. Follow this link to see Gamblin demonstrate applying their varnishing product with a brush: https://vimeo.com/91544967.

Armed with the above, you should feel confident that you’re taking advantage of the latest information, when varnishing an oil painting. In the next blog I’ll discuss the slightly different process involved in varnishing an acrylic painting.

The Balancing Act

Bare Tree and Pond Image
In progress pastel painting, “Bare Tree and Pond.”

I chose to use pastels during last month’s Yosemite Western Artists pleinair outing. It had been awhile since I’d worked with the medium and I committed to perform a pastel painting demo in June. I like to have a lot of new samples, in the medium I’ll be using, to display during demos, so it will be pastels from now until the June.

I spend most of my time painting in oils, but last year I painted in acrylics all year long in prep for a week of taking park visitors out to paint Yosemite, on behalf of the Yosemite Conservancy’s Art Center. They didn’t want me taking groups out to paint in oils for fear they’d irresponsibly dispose of their solvents.

I work in a wide variety of mediums, oils, acrylics, watercolors, pastels (haven’t dabbled in encaustics, yet), always have. I think I’ve discovered something useful to all artists in my experience doing this.

With great painting the elements in your subject matter determine application. You apply paint different when painting water than you do when painting trees or rocks, for example. Here’s where balance comes into play: whenever you become comfortable with any given medium (balance), you begin to take its application for granted.  It becomes too easy to rely on past “pat” successful application approaches, instead of letting elements determine fresh methods of application.

When you work with a medium you haven’t touched for awhile, you have no choice but to work with the attributes particular to that medium, redetermining application approaches. You’re a bit out of balance for awhile. The attributes of pastels, for example, force different application solutions when painting water, trees or rocks, than working with oils does. Acrylics, another unique set of attributes, as is the case with watercolors or graphite pencils or encaustics, etc.

When you return to your original medium of choice, you do so with fresh eyes (having been away from it for a time) and possibly new application approaches. For me, anyway, this ongoing introduction of imbalance, through use of a variety of mediums has kept me moving forward and cut down on repetition. I highly recommend it!


An Art Conversation on the Radio

As promotion for my upcoming solo exhibit, A Pair of Trowzers, Gallery 5 owner and print maker, Jon Bock and I traveled down into the San Joaquin Valley for an interview at KFCF 88.1 FM radio. The Sierra foothills are gorgeous this time of year, green grasses more reminiscent of Ireland than California. Our heavily snow-capped Sierras dominated the northern horizon. It was a perfect day to travel.

KFCF’s Free Speech Radio home is a modest converted 50’s residential residence just off the Tower District’s main drag, in Fresno, CA. Stepping through the front door, I suspected this would be an atypical Fresno experience. Warm greetings from the local radio personalities set us at ease. Jon is an old friend of the establishment, but this was my first visit.

Early at KCFC Photo
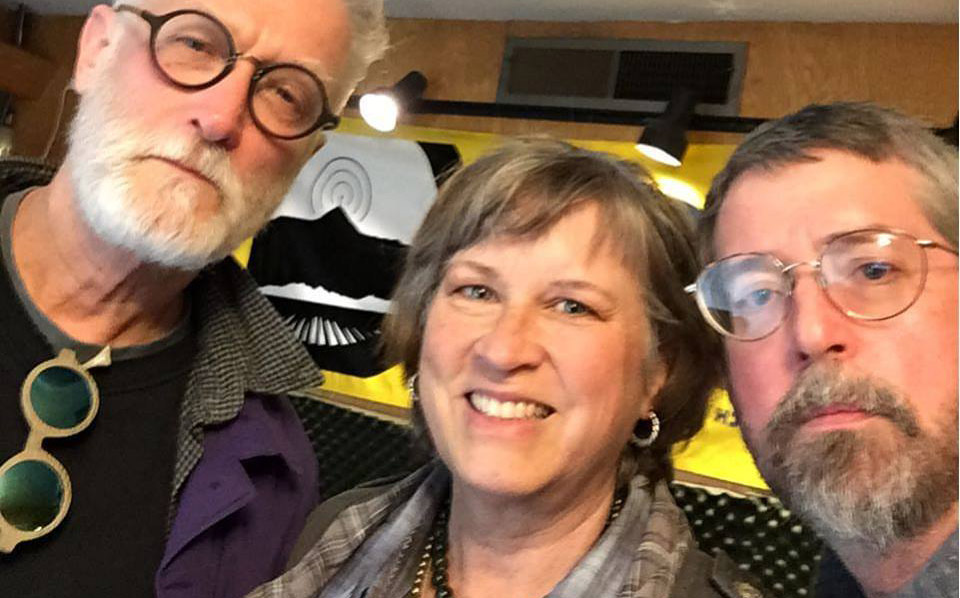
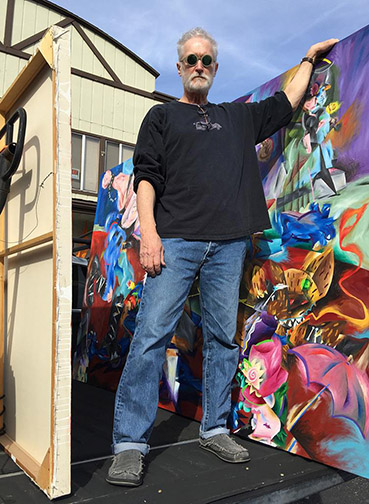
We were a bit early and the host of our segment on Art Attack, Janet Alexander Flores, had not yet arrived. A little time to chill with a cool bottle of water.

Janet arrived, introductions, a quick catch up on personal events with Jon (Jon and Janet have become old friends), sound checks and we were off. The half hour was less interview and more a 3-way conversation on art between friends, as we reviewed our backgrounds for the listening audience, then touched on my upcoming show, the opening of Jon’s new Gallery 5, Yosemite Renaissance, Sierra Art Trails open studio weekend, Yosemite Western Artist’s upcoming Tri-County show and concerns about likely changes to the National Endowment for the Arts (NEA) and how that would effect arts funding.

Headsets and microphones aside, the conversation continued, off-air, for another hour.

I’ve stumbled on an oasis of like-minded intelligent souls in an increasingly intolerant world. Thank you KFCF for a very pleasant, reaffirming afternoon.

A Pair of Trowzers at Gallery 5

Trowzers in Truck Photo
Photo © 2017 Kathy Marks

A new Gallery is about to open at Gallery Row here in Oakhurst, Gallery 5. The new gallery is the effort of Jon Bock. This will be gallery number three for Jon, behind his thriving Williams Gallery West and Stellar galleries.

I was honored to be asked to mount the opening show at Gallery 5, a solo exhibition of my work, which will include equal amounts my representational and abstract works, the reasoning behind the show title, A Pair of Trowzers.

A Pair of Trowzers Photo
Photo © 2006 Kerby Smith

I’d like to take full credit for the title, but in the interest of full disclosure, it was originally coined by my friend, award winning photographer and fiber artist, Kerby Smith. Seeing my large paintings hanging in the trees, 11 years ago, during Sierra Art Trails 2006, Kerby asked if he could come by and photograph them the following day. The result was this photo of me bookending my work, which Kerby titled, A Pair of Trowzers.

The title was too perfect a fit not to ask Kerby if he’d mind my using it for the upcoming show.

A Pair of Trowzers will be up at Gallery 5, 40982 Hwy 41, Oakhurst, CA 93644 beginning this Saturday, February 18th and will run through March 26th, with an artist’s reception on Saturday, March 18th.

I hope you get a chance to stop by and see all I’ve been up to.

You can view a short preview in the form of a rough 3D mock-up I created to map out the show at: https://youtu.be/m9-NkEGvSXw.


Have You Discovered Art21?

Art21 is the PBS broadcasted series on fine art in the 21st Century, now in its 8th season. Each week it deals with a sampling from current fine artists in a different world city. Last week it was Mexico City, next week will be Los Angeles, 2 weeks ago it was Chicago, etc., etc.

Don’t ask me why it’s taken me so long to notice it (actually I have a vague recollection of coming across it several years ago, but it somehow got pushed out of my tv watching queue). Anyway, I’m back and aware now.

It’s a great insight as to why the artists are doing what they do, in their own words, right out of their own mouths. Fascinating!

Learn more at: http://www.pbs.org/program/art21/